
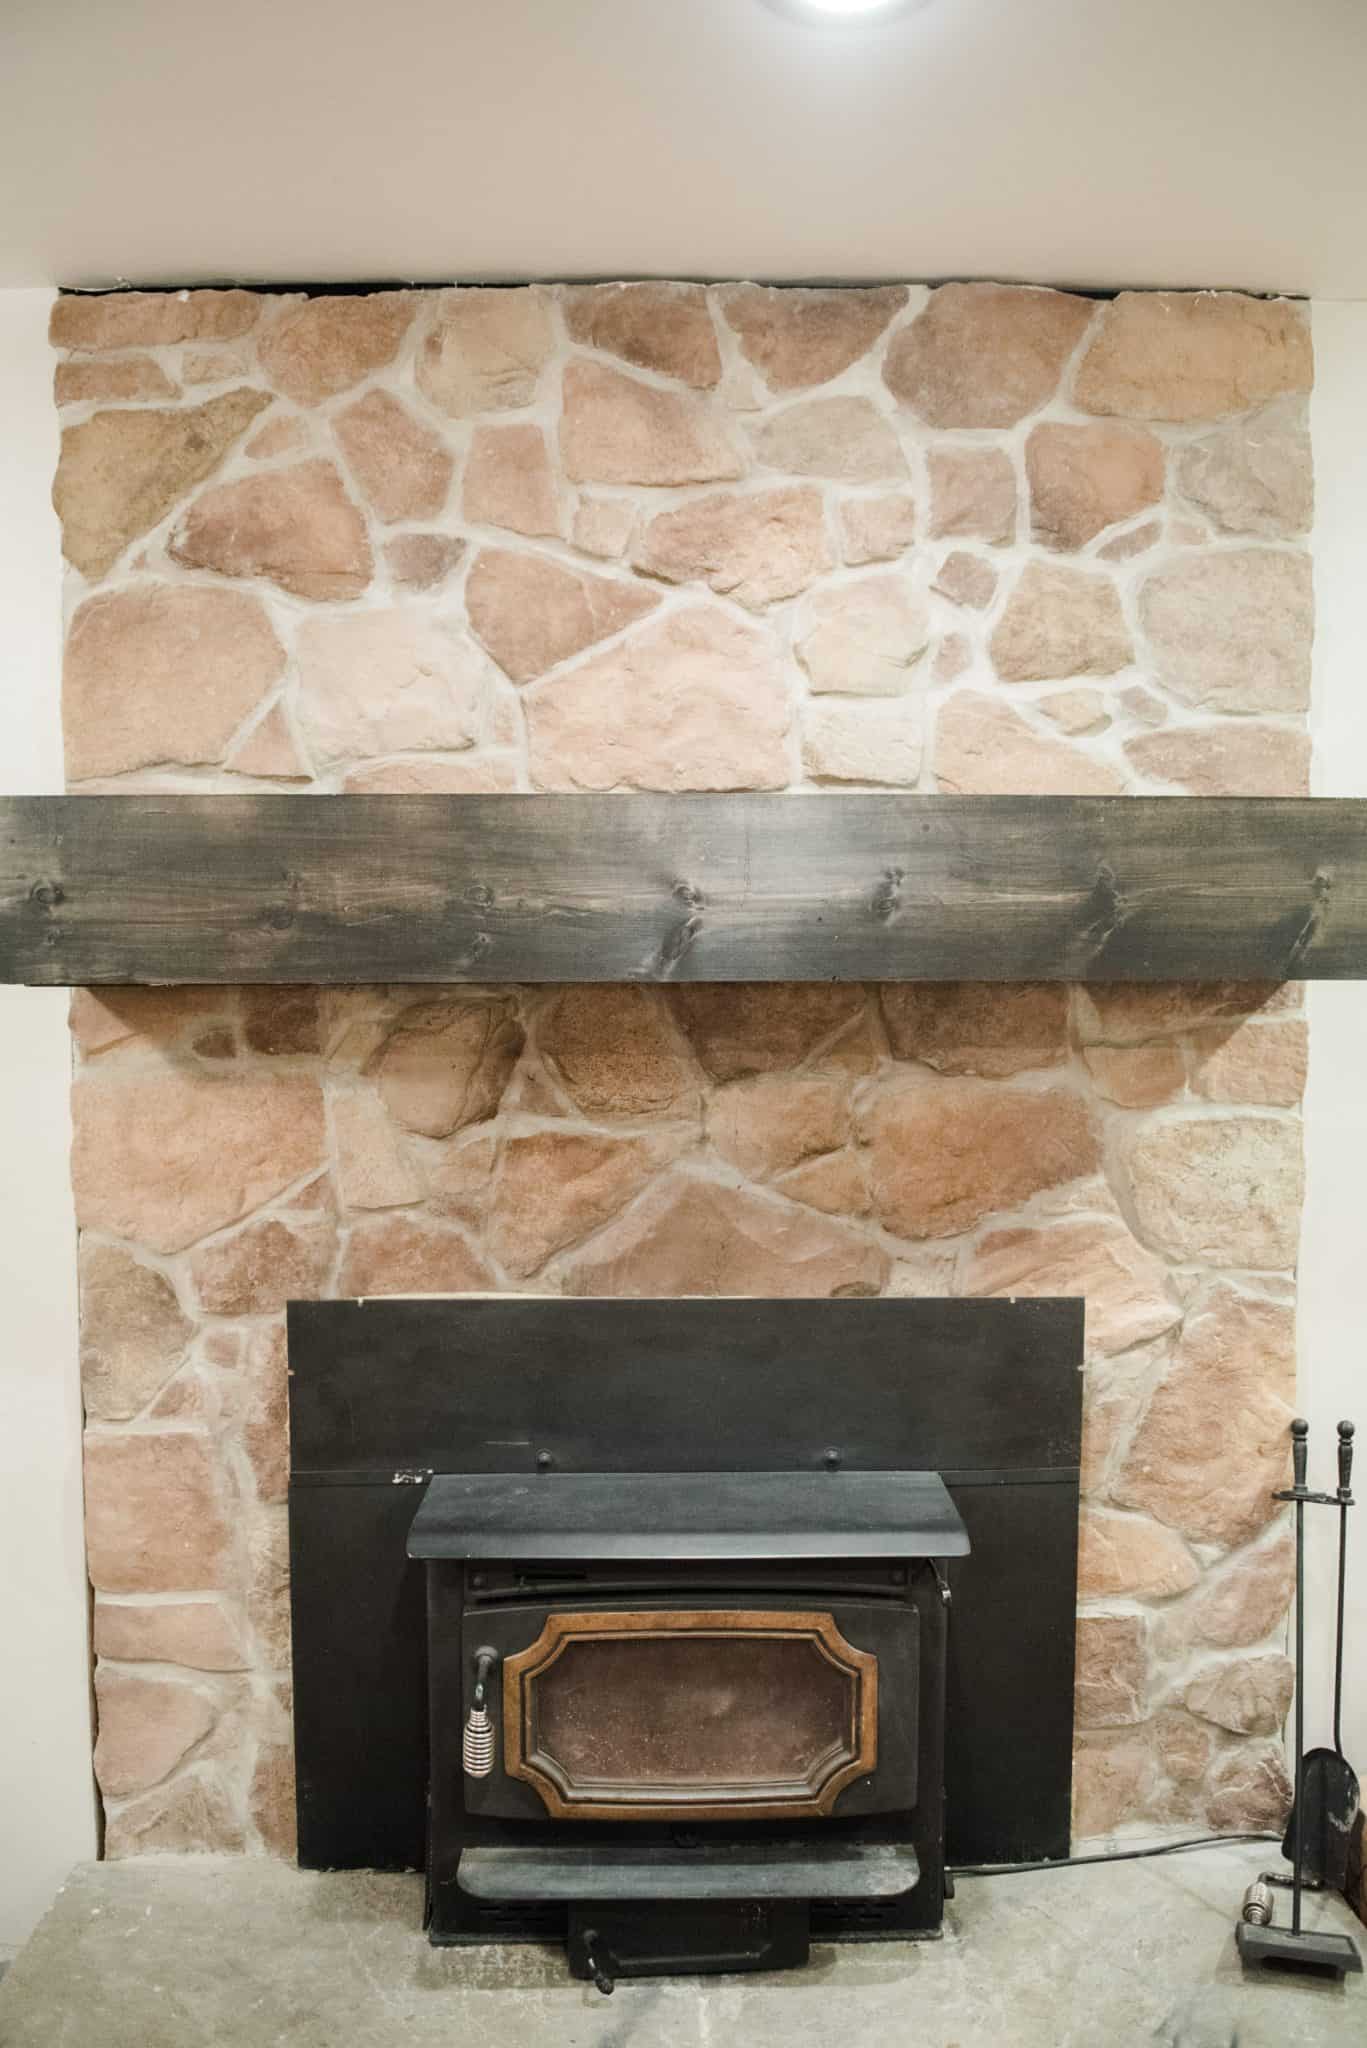


We’ve lived in our house for 6 years and the first thing we wanted to do when we moved in was to finish out the basement and hang a mantel above the fireplace. The stone was already in place when we bought our house, but the rest of the basement was concrete block and concrete flooring. Last year we tackled the basement and finished it out with a new full bath, new windows, new sliding glass door, flooring, and sheetrock. For all of these years, every time the holidays would roll around we would always talk about how we desperately wanted to hang our stockings above the fireplace. But we never did anything about it because it seemed too difficult. We didn’t have the tools and as you can see below, the stone wall isn’t flat by any means.
Enter Pinterest.
I started a little research to figure out how we could get this done on a budget, doing it ourselves with minimal problems. The thought was daunting but with a little coaxing from me, my husband was willing to help me out. Please note that this probably isn’t a one-person job so having an extra set of hands will help. However, if you’re the only one there to do this in your own home you may be able to do it yourself with a little patience and elbow grease. The lifting isn’t heavy lifting and depending on the size of your own fireplace, you shouldn’t have a difficult time building the mantel but you may need help hanging it.
Let’s dig in!
Tools Used:
Two 2 x 4 x 6 boards (I purchased a 2 x 4 x 12 and the guys at Ace cut it in half for me)
Two 1 x 10 x 6 boards
Two 1 x 8 x 6 boards
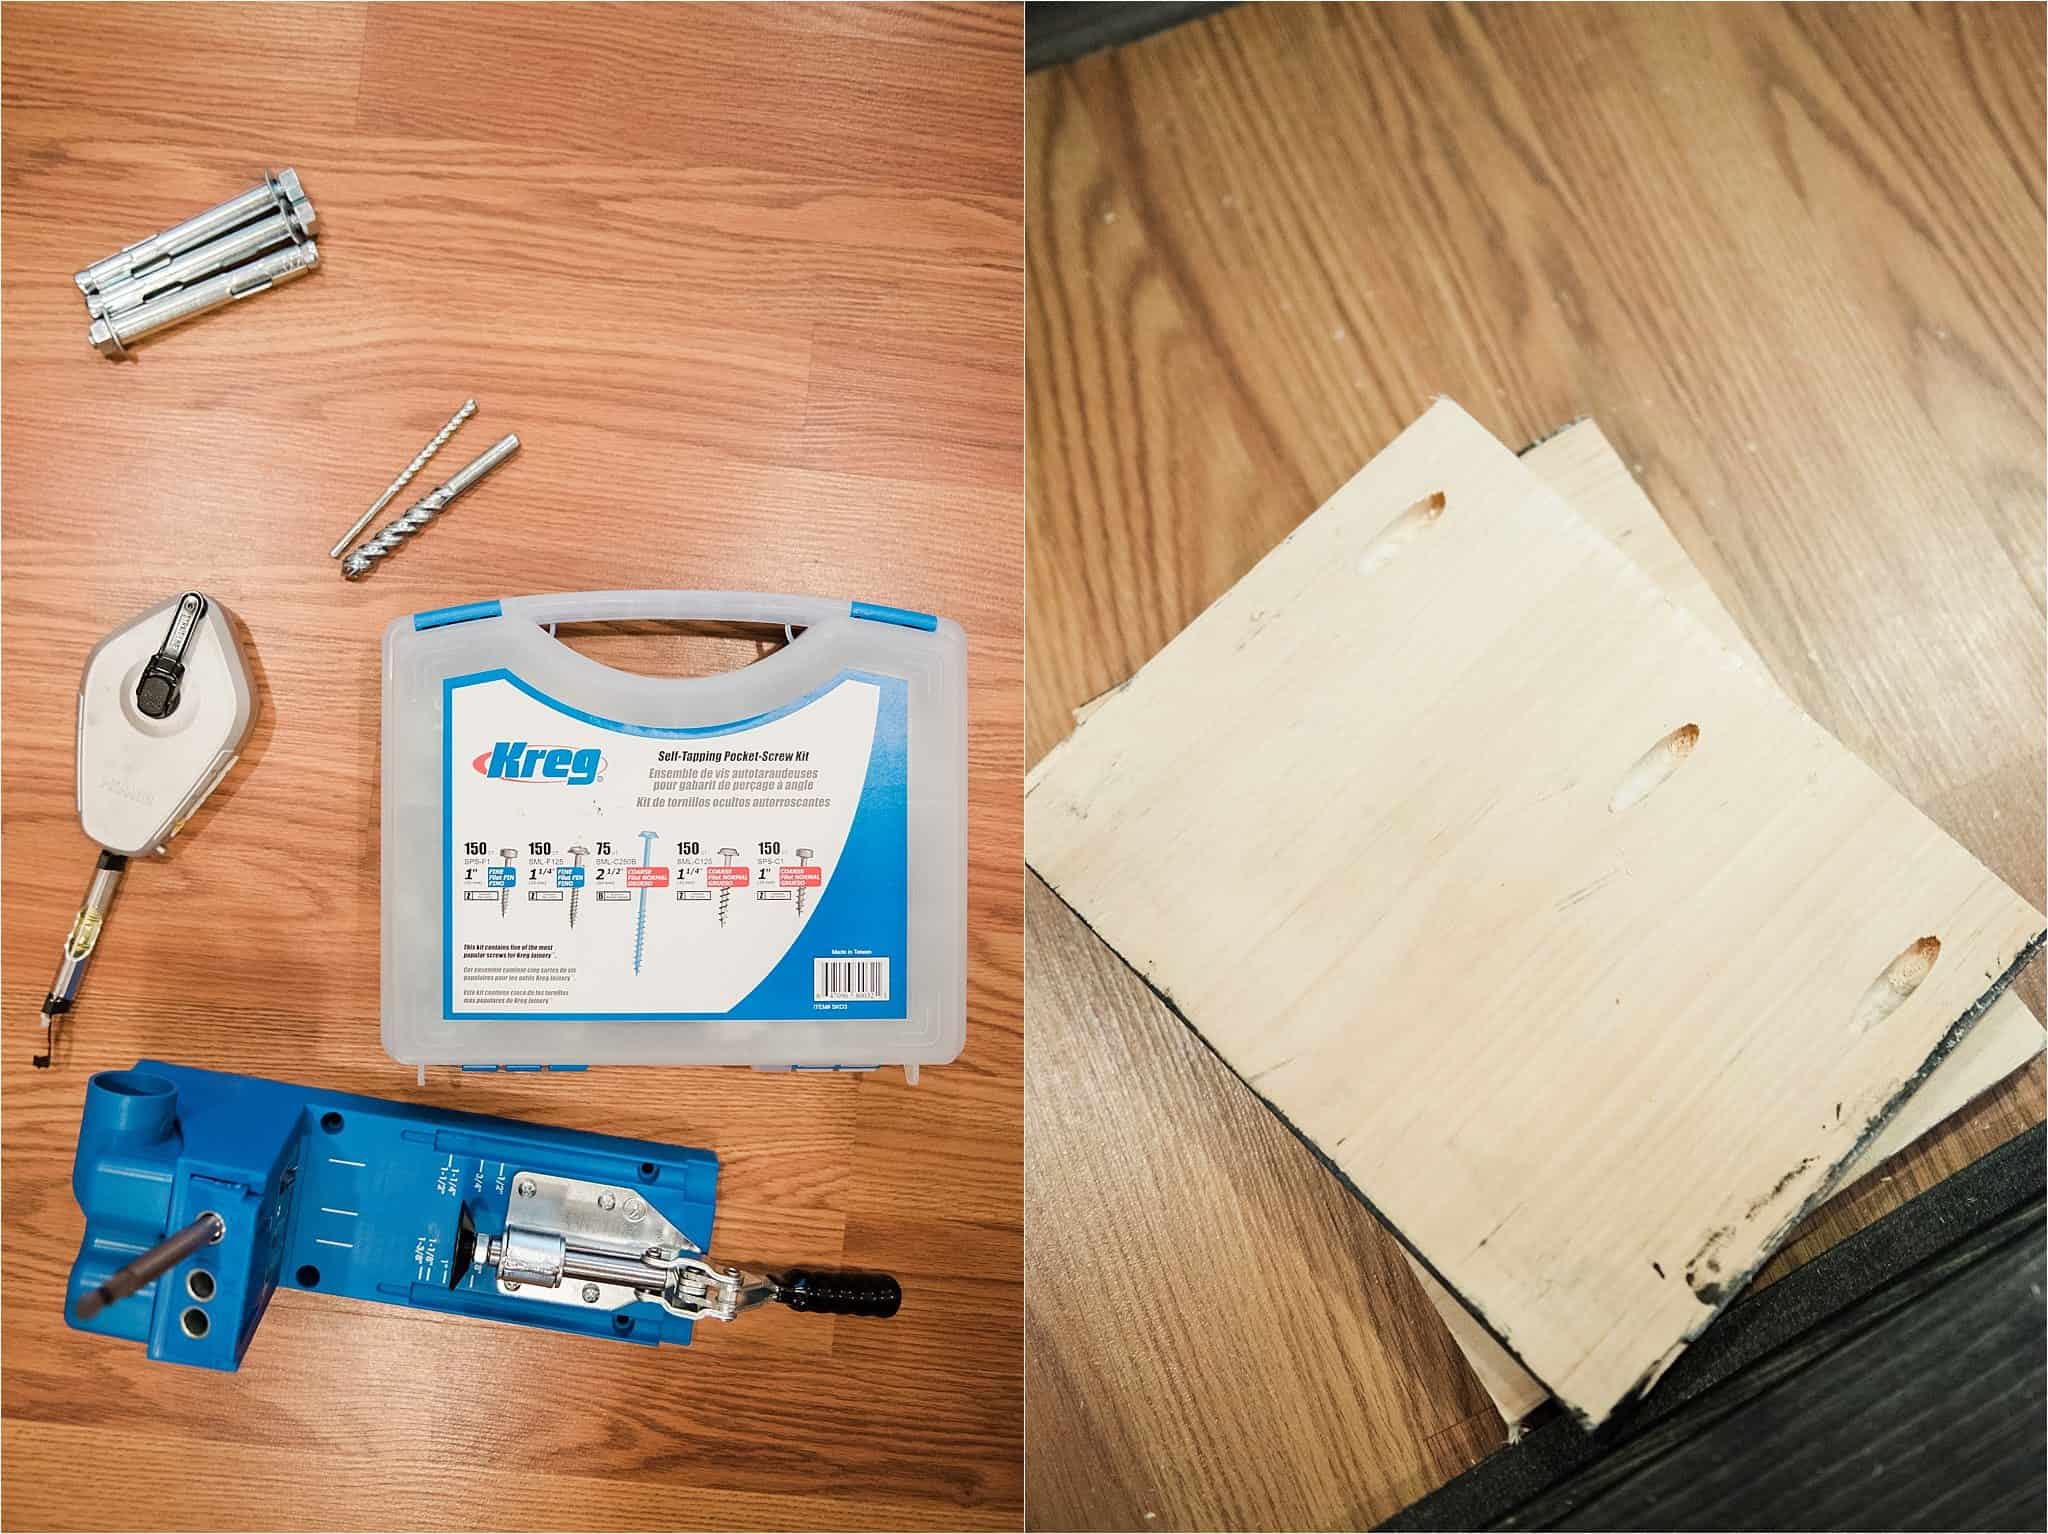
Three 1/2″ x 6″ sleeve anchors
wood glue
hammer
chalk line
line level
1/4″ masonry bit
1/2″ masonry bit
drill
Kreg pocket hole jig and screws
wood stain
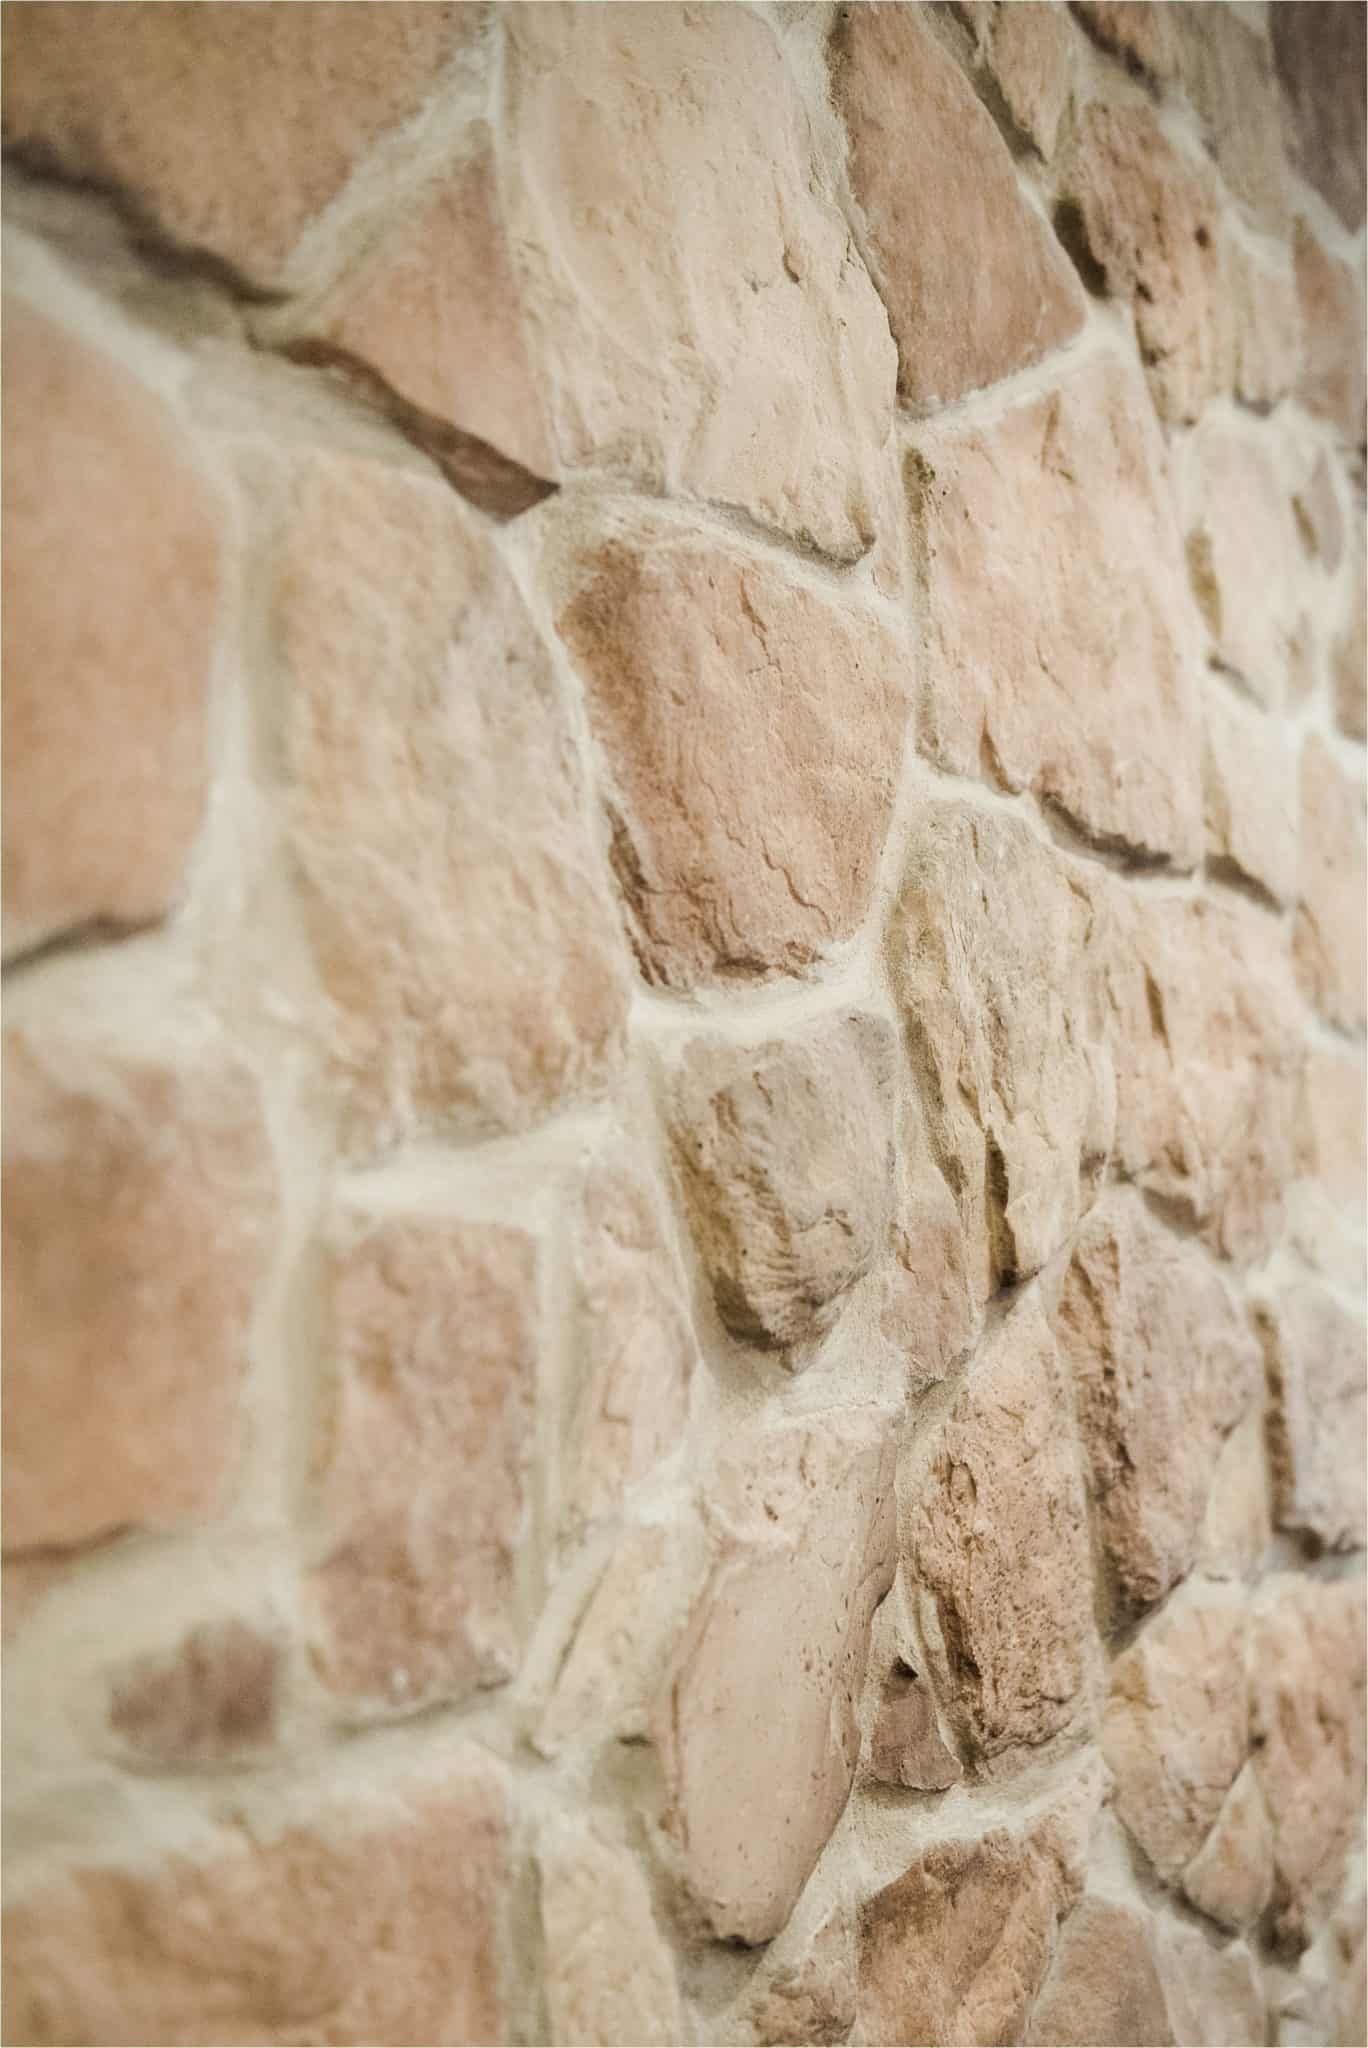
We didn’t have a lot of these tools and supplies so we had to purchase them when we purchased the wood boards for this project. However, if you do have them at your disposal your costs for this mantel will be much lower than ours was. We ultimately ended up spending around $200 for the whole thing. But I’ve also read that if you have most of these tools/supplies you can easily keep the costs below $75. You can tell by looking at our stone wall that it’s nowhere near a flat surface! This made us nervous. I have read that you could always scribe against the wood and cut it out so it fits perfectly against the stone with no gaps. We didn’t do this because we eventually saw that, after hanging the finished mantel, you couldn’t see those gapped areas – so we didn’t bother.
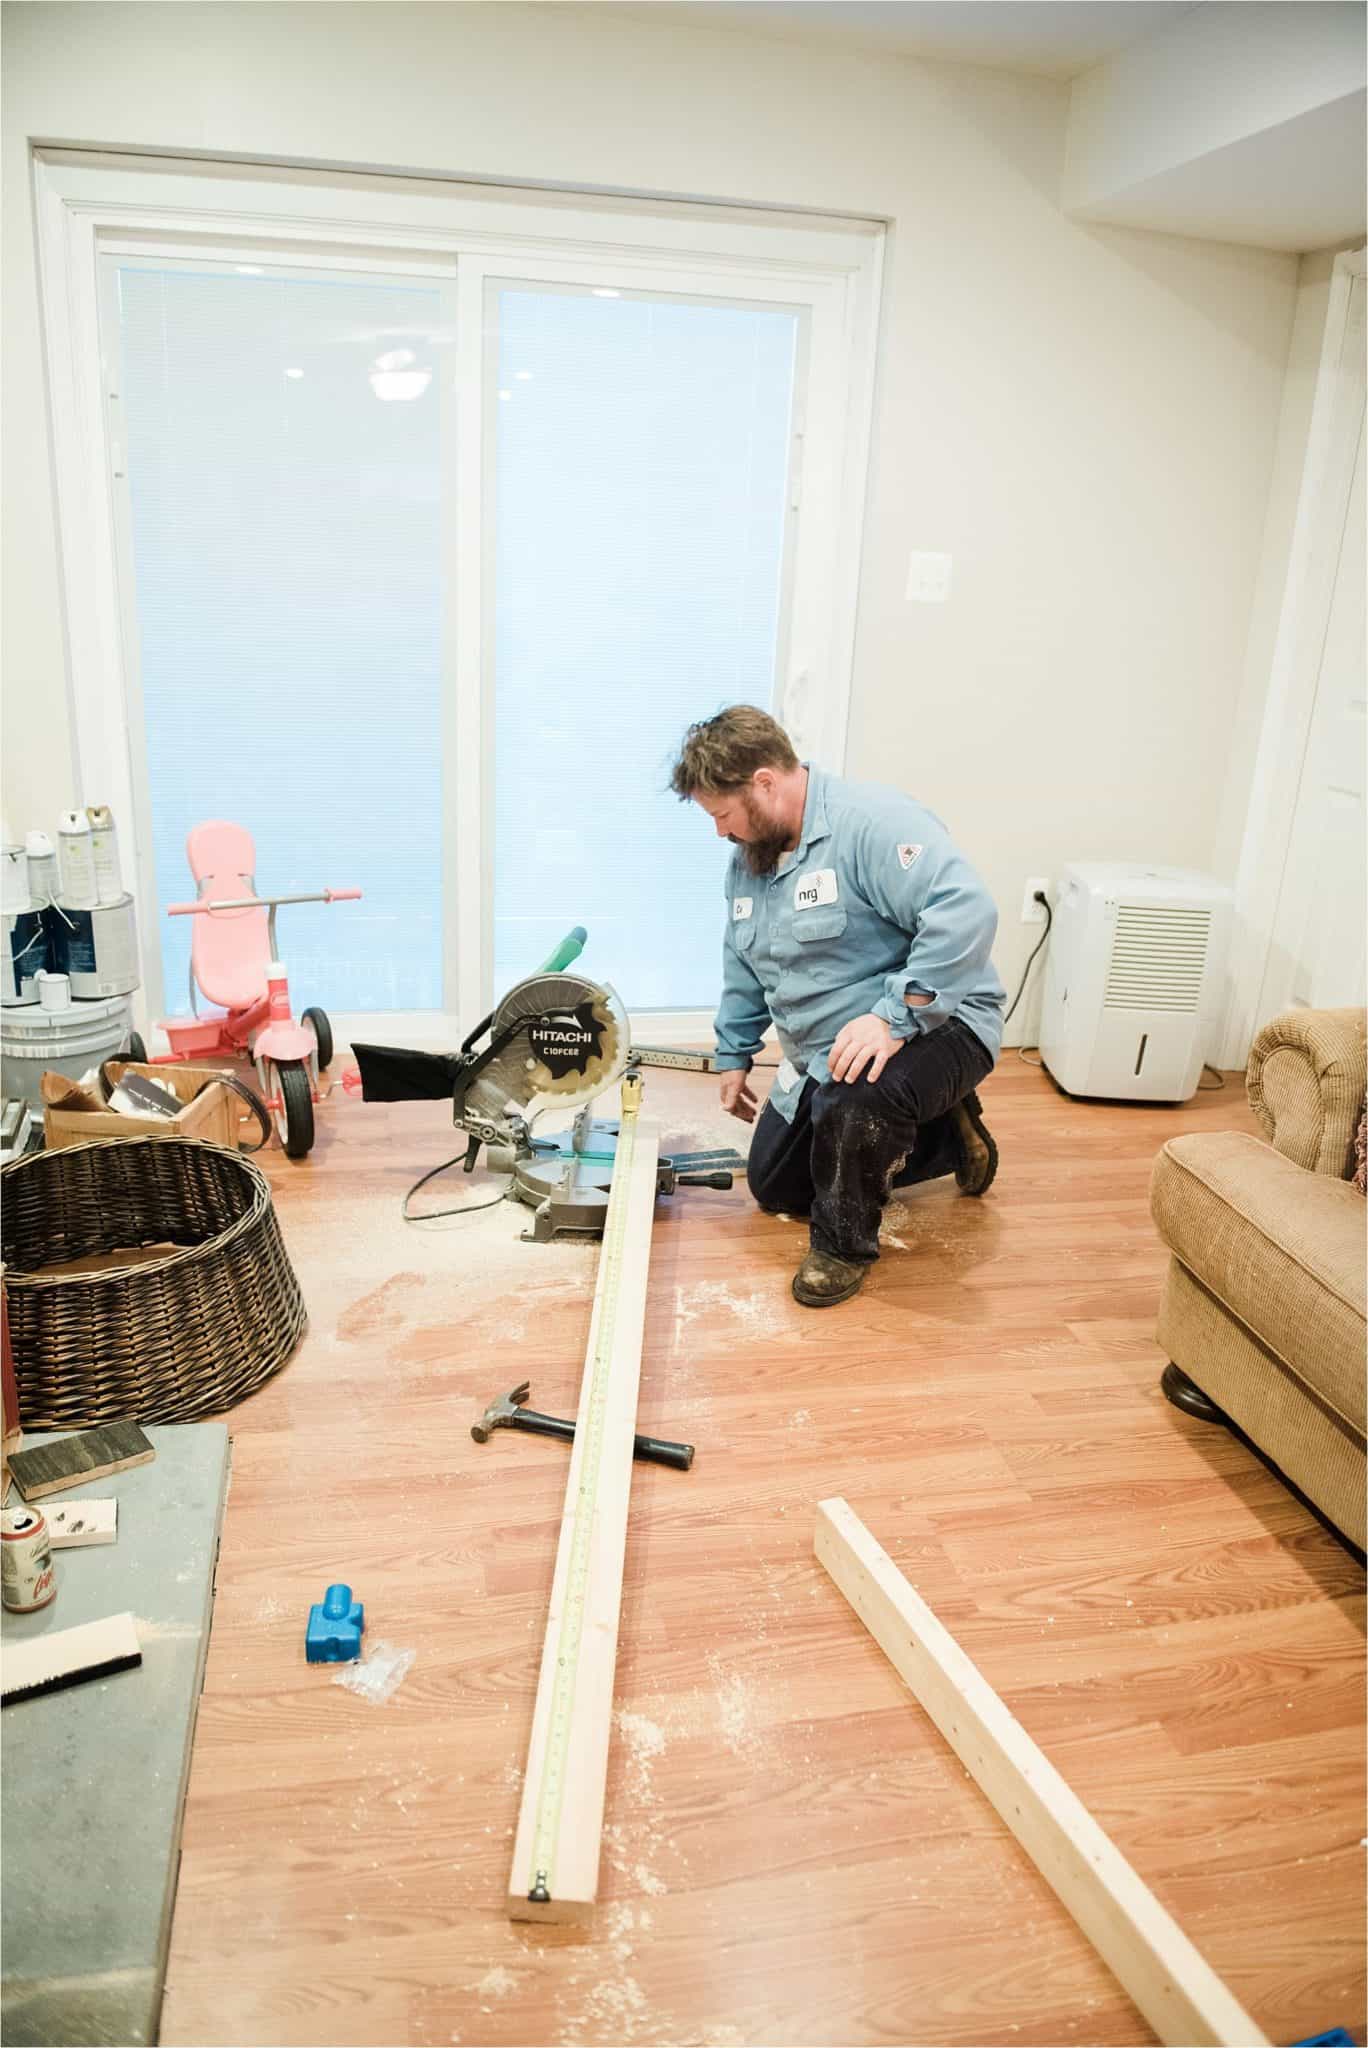
First, we cut one of the 1 x 10 x 6 boards to 69″. We knew that we wanted the mantel to stretch the full width of the stone wall and measured that before cutting. This didn’t leave much scrap wood left over so I purchased a second board of the same size so I could measure and cut wood for the sides of the mantel box. We cut two 7 x 1.4″ pieces from the second board. That gave us three of the five sides we’ll need for the mantel. Once we measured and cut the boards we laid everything out to begin drilling the pocket holes using the Kreg jig. This took a little bit of time for us to master because neither of us have used one of these before. The instructions gave us the settings of the jig based on the width of wood we drilling into. You can easily figure your settings by checking the instructions as well. Based on the width of our boards we knew we needed to drill 3/4″ pocket holes, and set our jig accordingly. We drilled three pocket holes into the two 7 x 1/4″ pieces and then drilled 8 pocket holes along the 1 x 10″ board.
I jumped a little ahead of myself and stained our boards before we did any cutting, and while my husband was cleaning out the gutters. I was a bit excited to get this project started and will eventually need to restain some spots to touchup. But it never was a big problem that I stained first and cut later.
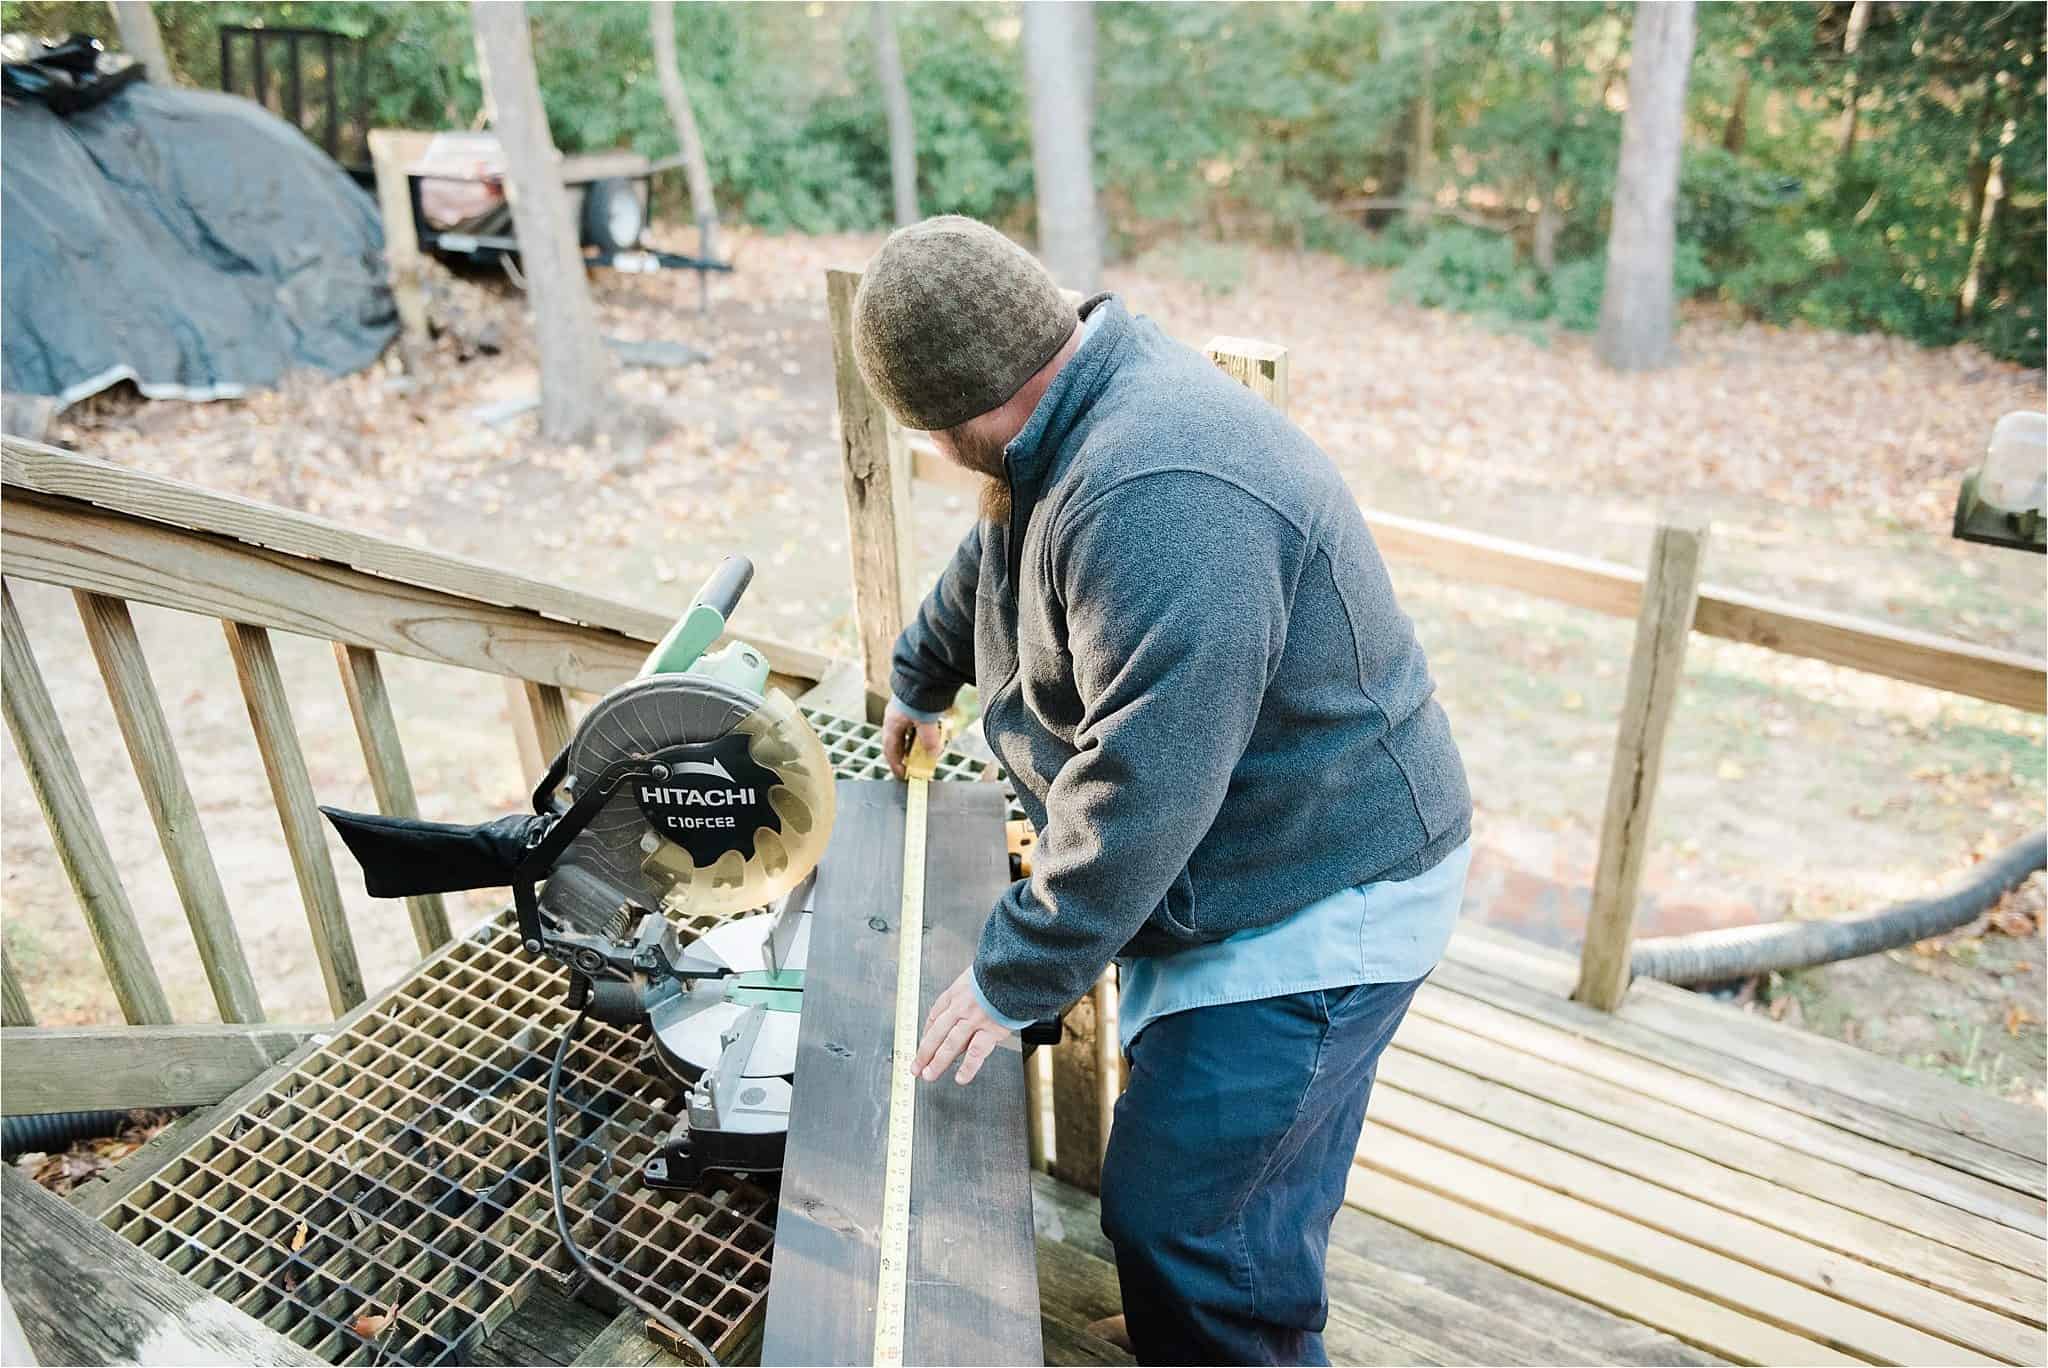
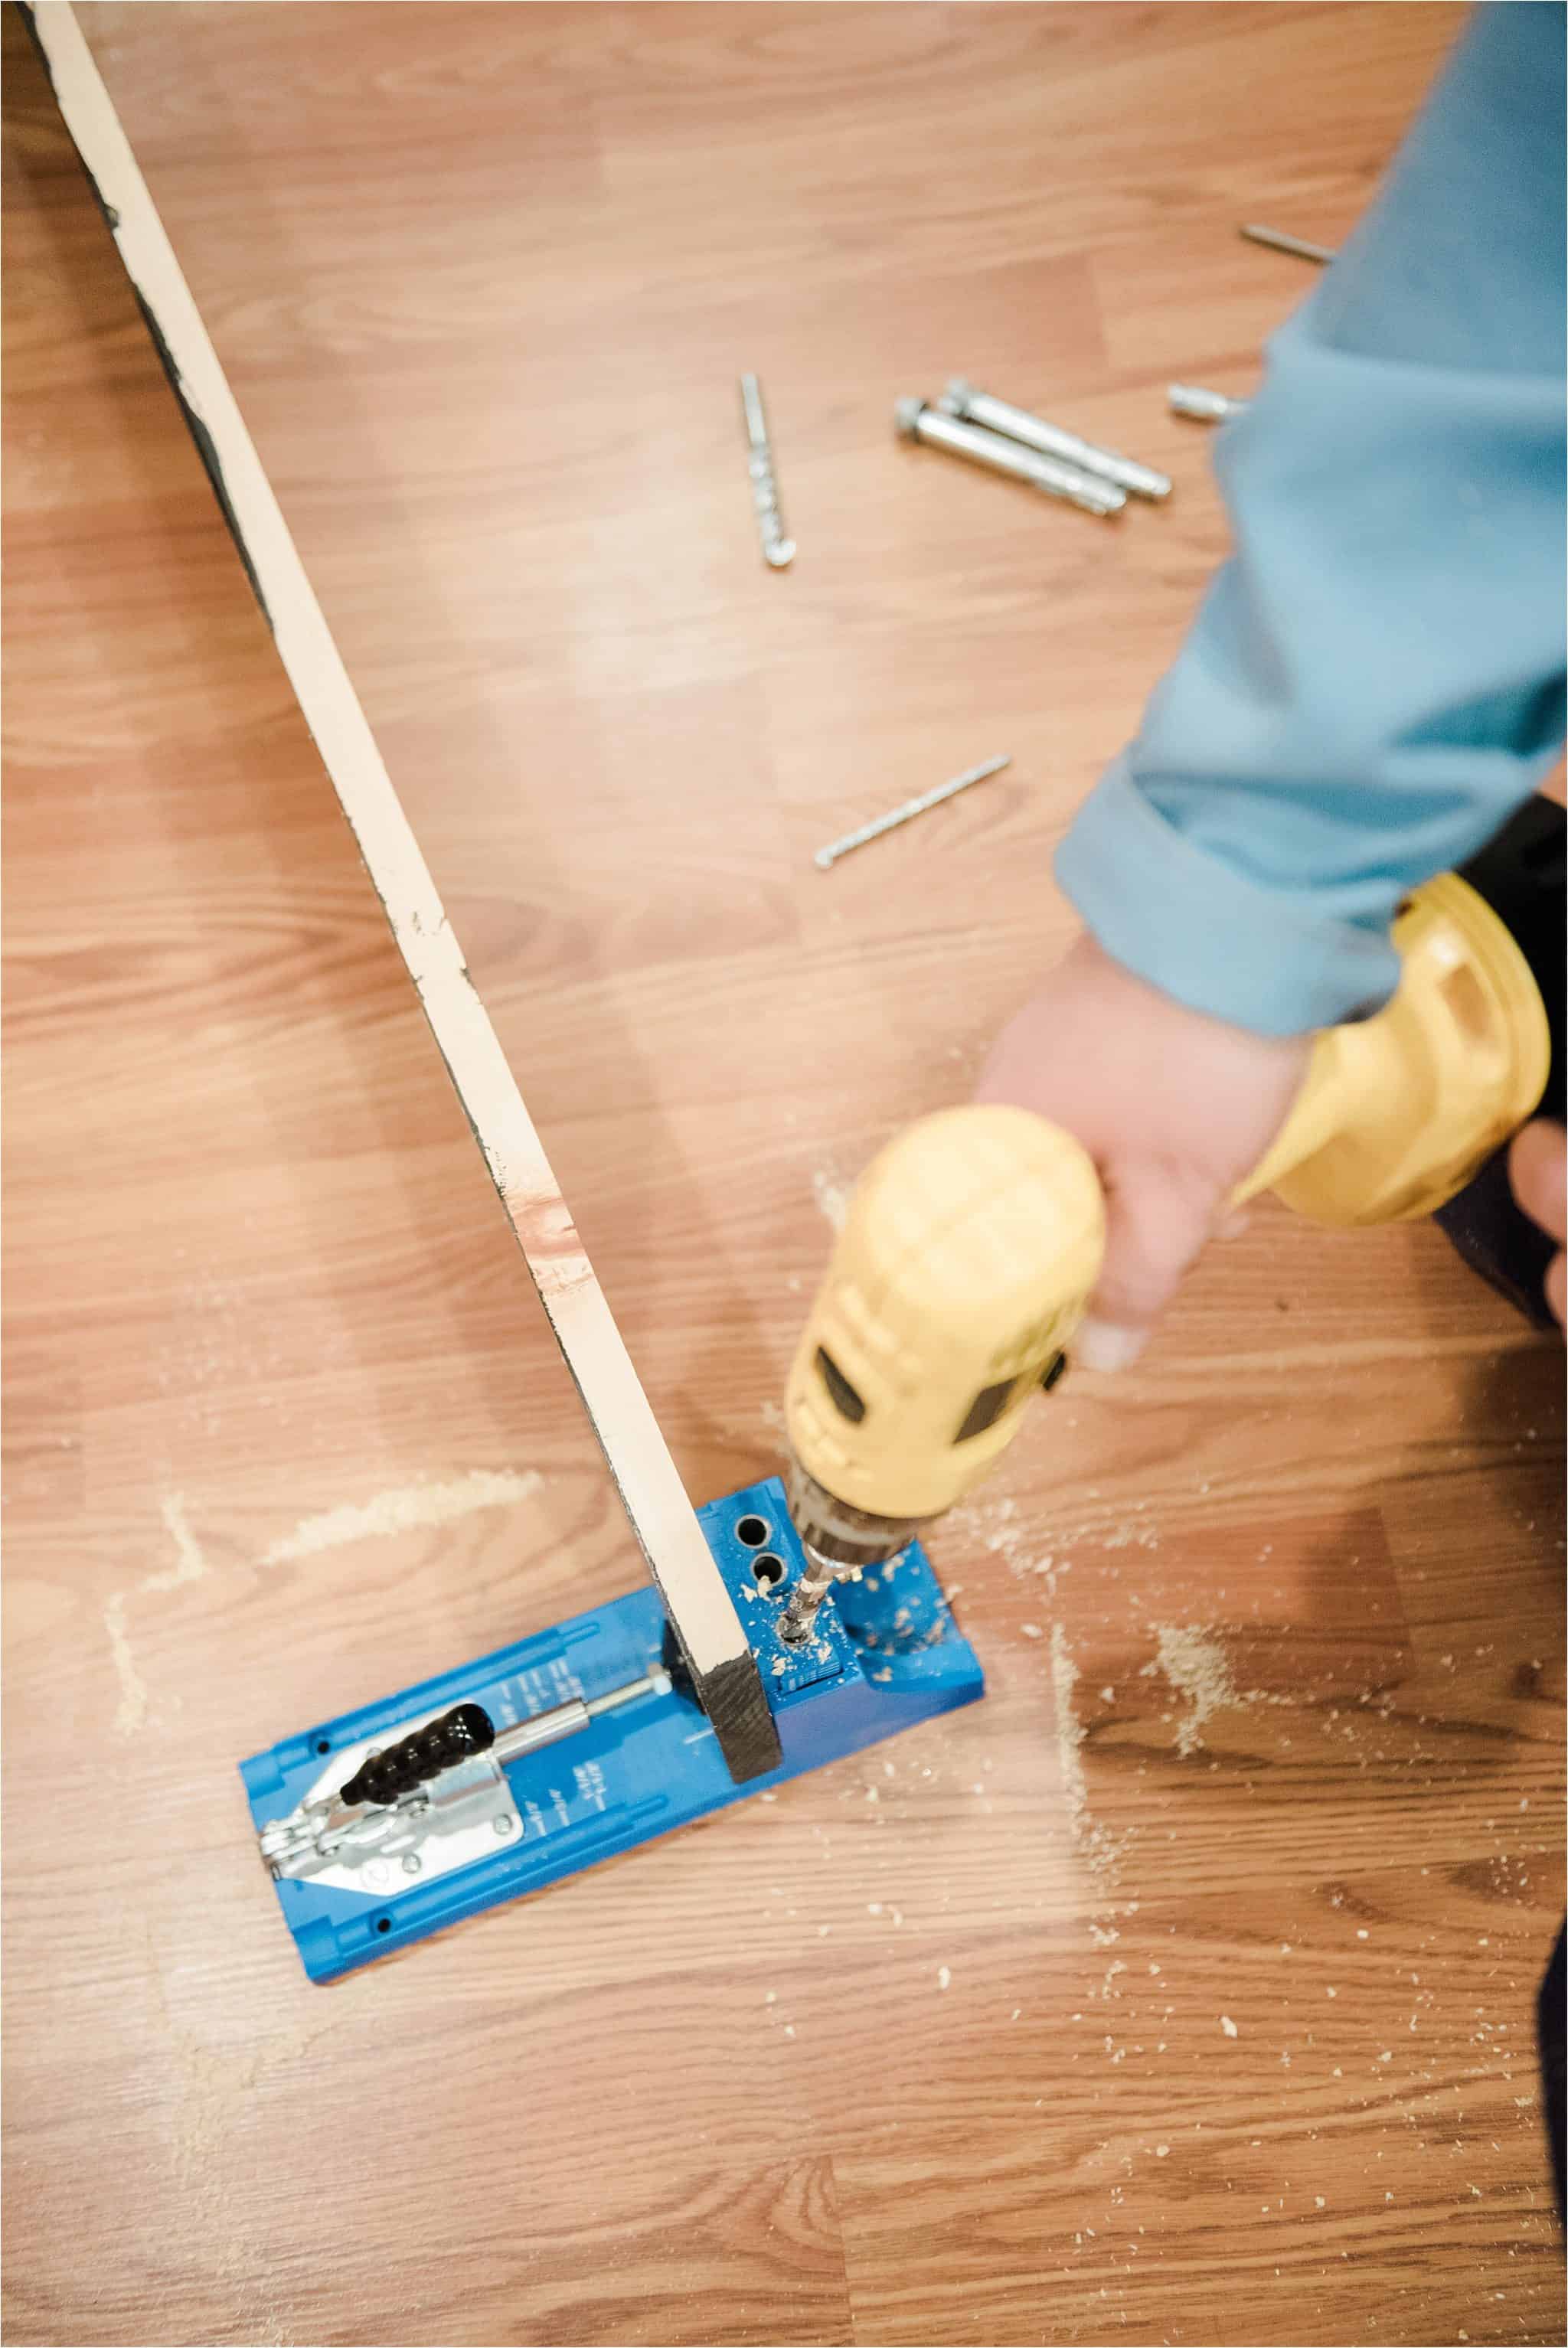
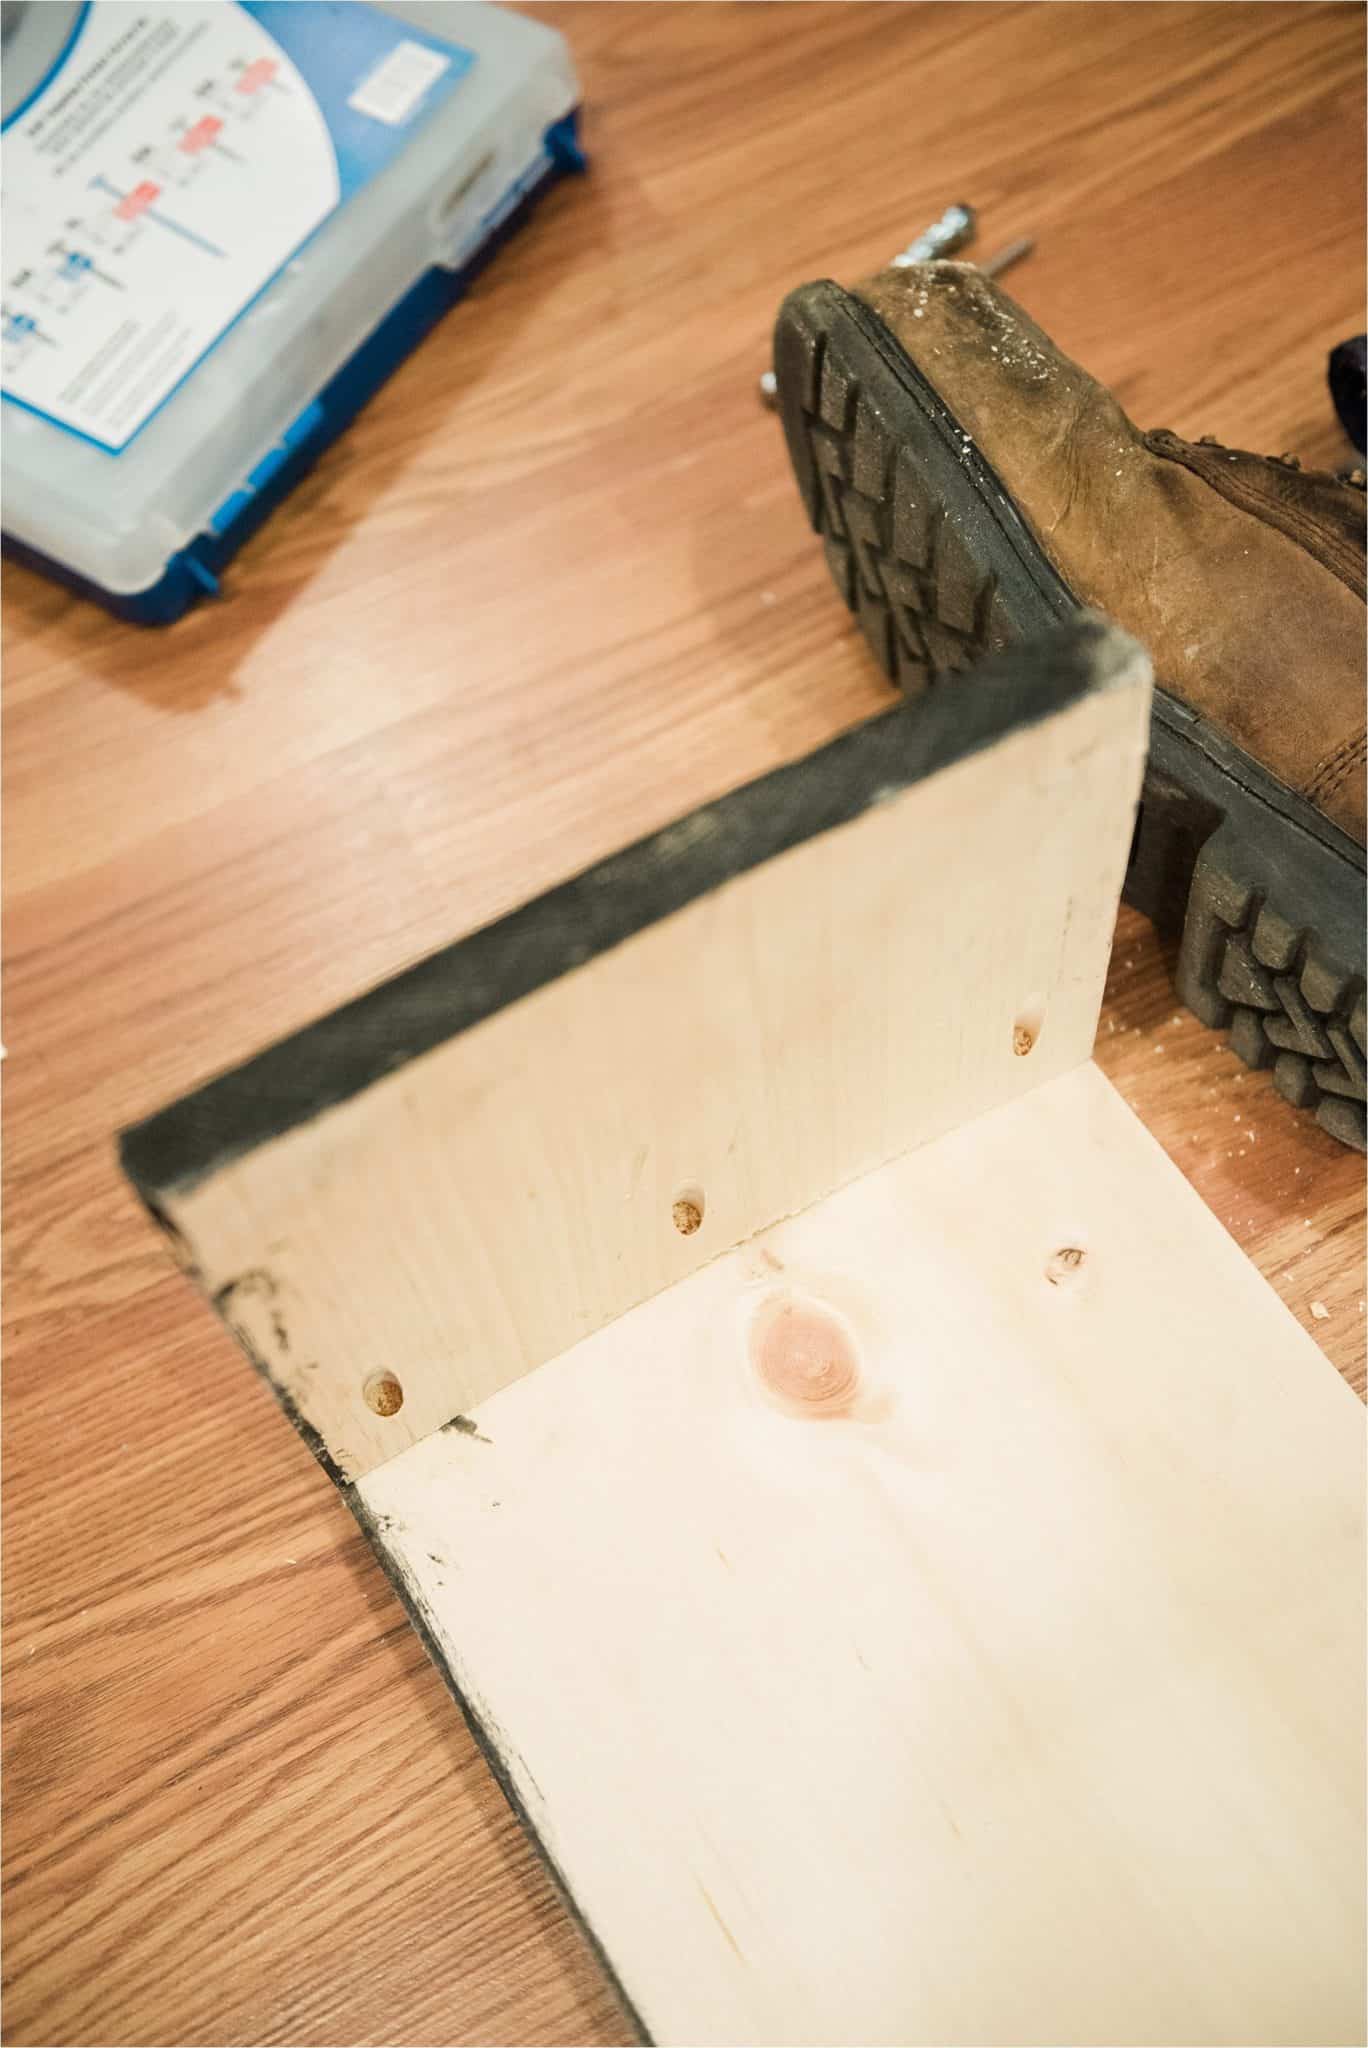
Once the pocket holes were drilled we placed the front mantel piece and the two side pieces together. Placing a little line of wood glue along the seams, we screwed the pieces together securely. Then we measured and cut both 1 x 8 x 6 boards to 67″ in length to take into account the extra 1″ in width each side board provided. We drilled pocket hold with the Kreg jig along the edges of both boards and screwed them into the 1 x 10. This gave us a full mantel piece with an open back.
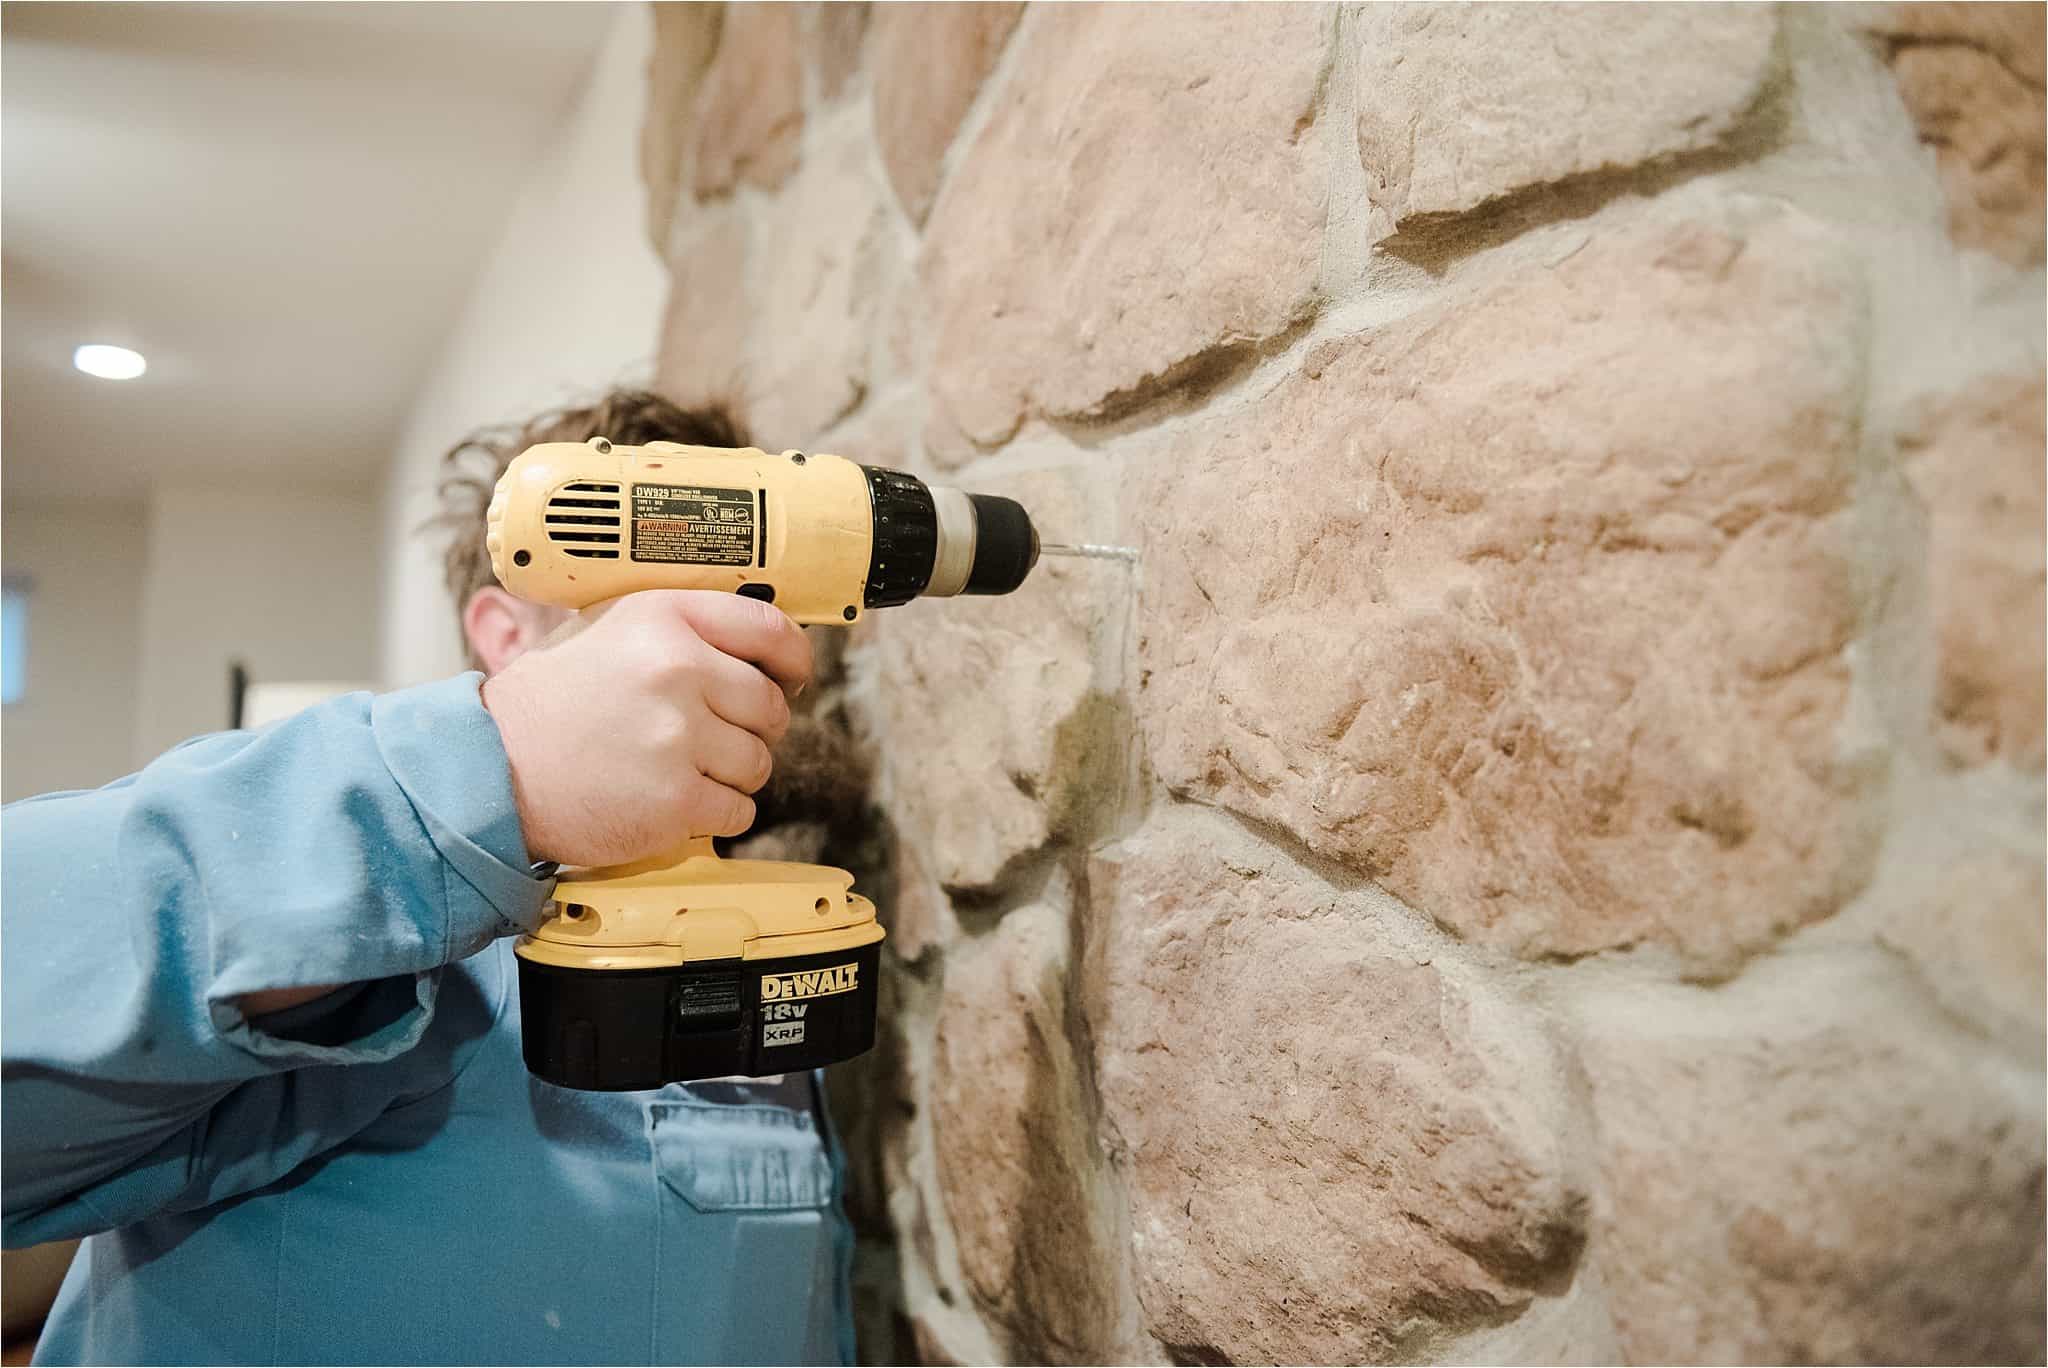
We put the mantel to the side and began working on putting together the bracket that would hold the mantel to the stone wall. First, we had to measure, level, and drill the holes in the stone. This part proved to be a bit challenging for us! But after figuring out how to level the board on the uneven stone surface, we marked our hole placement with a black Sharpie marker. Using the 1/4″ masonry bit, my husband drilled the starter hole into the stone. We started with a smaller bit and then moved up to the larger 1/2″ bit in order to avoid cracking the stone. We knew the stone wall was about 1″ thick before we reached the block wall. We also knew that we should NOT drill into the flue of the fireplace! So we were very careful with the depth in which we drilled each hole. Taking into account that we needed at least 2″ of the anchors out of the wall for the board, we would need at least a 6″ anchor. This can be adjusted for you depending on the width of your wall and how far you have room to drill into your wall before hitting the flue. Be careful with your measurements, please!
He started drilling the 1/4″ hole and then put the 1/2″ bit into the drill to finish. Then we placed each of the three anchors into the drilled holes.
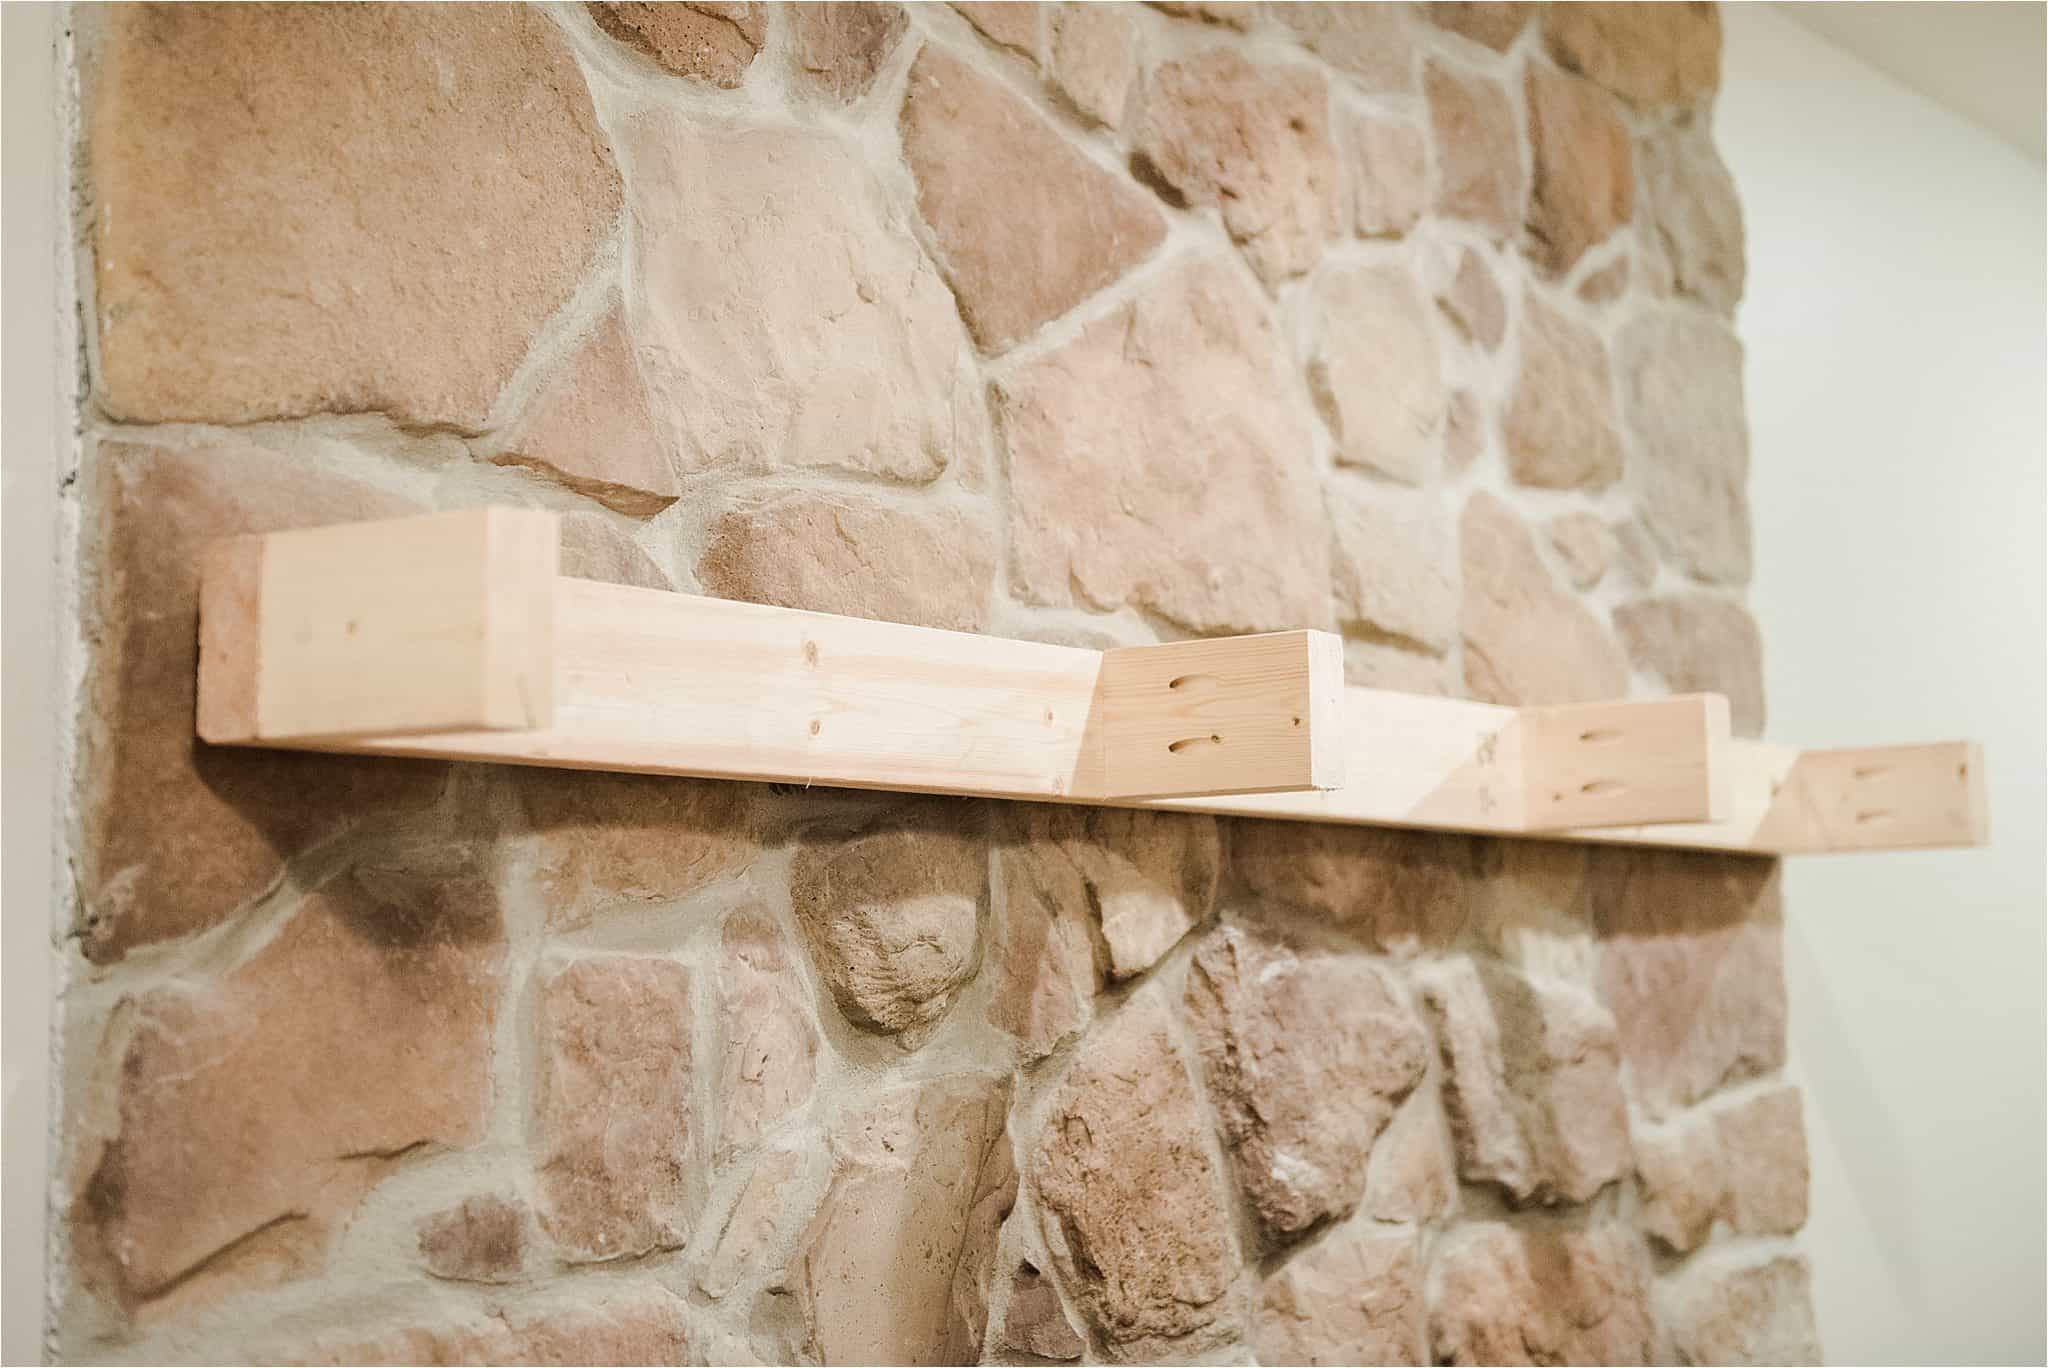
Our 2 x 4 boards needed to then be cut to 67″ in length, allowing for space to fit inside of the mantel box we just made. We cut one board to 67″ and predrilled the holes to match the anchors that were now in the stone. This would be the base of the bracket that would hold the mantel to the wall. We then cut the next 2 x 4 so we would have four 5 1/2″ pieces. Each of these 5 1/2″ pieces would then get two pocket holes drilled into them with the Kreg jig so they could easily be screwed to the base board. Each of these pieces were evenly placed on the base board and screwed in.
Here’s the bracket using the 2 x 4 boards, now hanging on the stone wall with secured anchors. We double checked the level to make sure everything looked good before moving on to securing the mantel to the bracket.
Next, we picked up our mantel box and placed it over the bracket that was securely fitted to the stone wall. With an air gun and finishing nails we nailed the left and right sides of the mantel to the bracket underneath it. This secures the mantel to the wall to prevent tipping and making sure the leveling was correct.
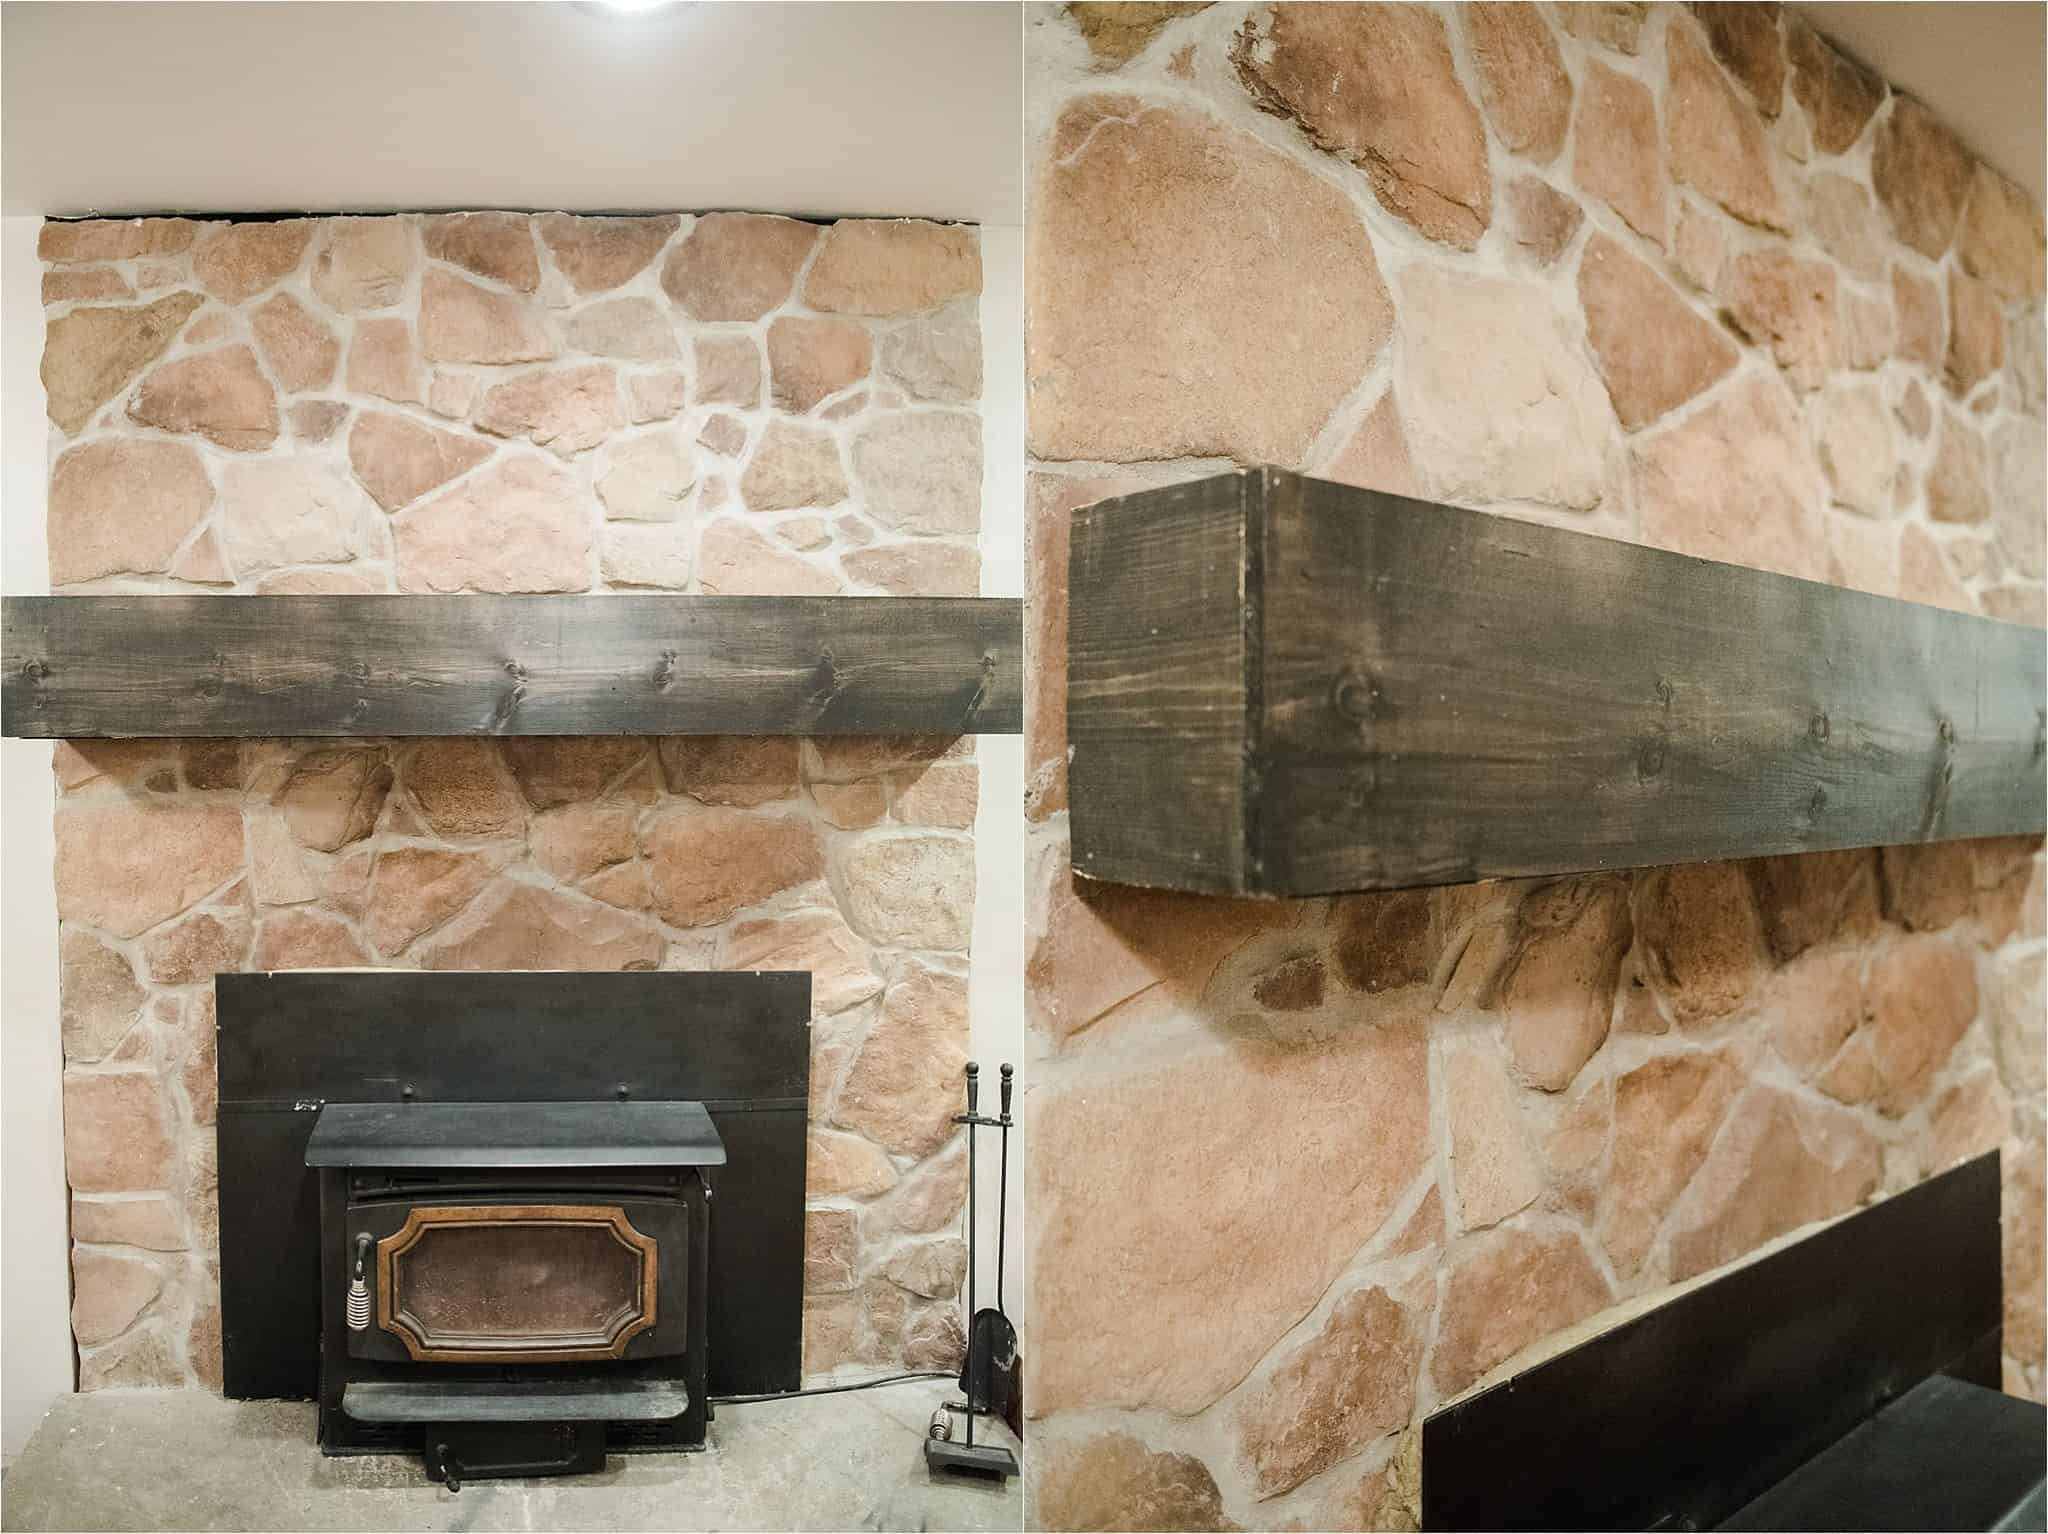
We’ve never done anything like this before in our lives! And I’ve heard numerous times that tackling a project like this together with your husband/wife is a sure test of the strength of your marriage. LOL! Most of the time, we would have ended up arguing and edges not matching up and screws not going in properly or splitting wood. I swear, the purchase of our Kreg pocket hole jig ended up saving this project for us! We didn’t have a single split board and everything fit together perfectly (with the small exception of our anchors, which took a little figuring out before we got it right). All-in-all I really LOVE our little mantel and I’m dying to finally hang our stockings on it!!
If you have questions for me about how we did this, feel free to leave a comment below! I’m an open book. Happy building!!


")


